2.1 ติดตั้ง LoadBalance RB750GL แบบ 4 PPPOE to 1LAN
 2.1 ติดตั้ง MikroTik RB750GL แบบ 4 PPPOE to 1 LAN - Load Balanced 4 เส้น
บทความสำหรับ: ผู้ที่มีความรู้เกี่ยวกับระบบเครือข่ายในระดับเบื้องต้นถึงปานกลาง (v1.1)
โดย วิทวัส โฉมประเสริฐ, ศุภสิทธิ์ ศิริพานิชกร, เจตน์สันติ์ ยาวิลาศ
คำถาม
ต้องการทำ LoadBalance รวมเน็ตจำนวน 4 เส้น โดยเซ็ตโมเด็มเป็นแบบบริดจ์ทั้งหมด แล้วให้ MikroTik รุ่น RB750GL เป็นสั่งการเชื่อมต่อ PPPOE ต้องทำอย่างไร?
คำตอบ

วิธีการตั้งค่า LoadBalance RB750GL แบบ 4 PPPOE to 1LAN
- ดาวน์โหลด Winbox แล้วเสียบสาย LAN ขา Ether5 ของ MikroTik
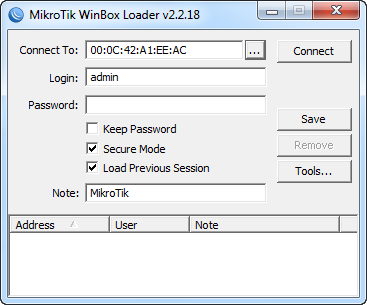
เข้าโปรแกรม Winbox แล้วคลิกเลือก mac address MikroTik ที่ broadcast เจอ แล้วกด Connect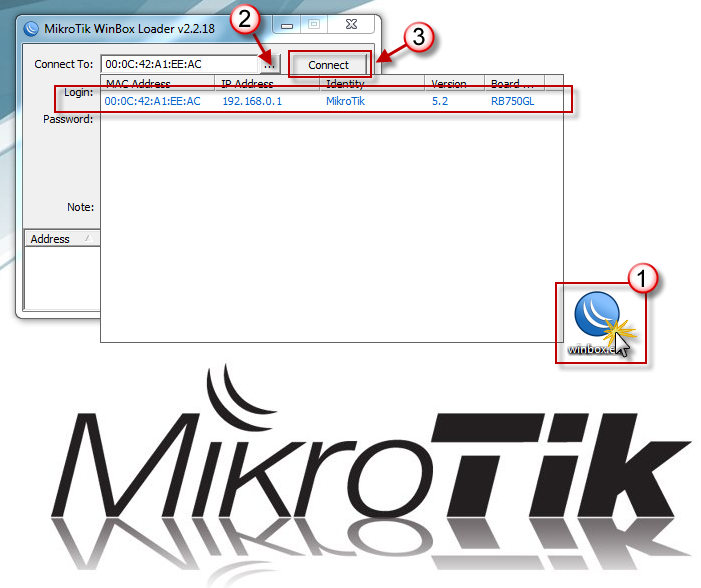
- จะมี mac address ของขา LAN (RB750GL) ที่เราเชื่อมต่ออยู่ ขึ้นมา กด Connect เพื่อเชื่อมต่อ
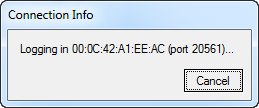
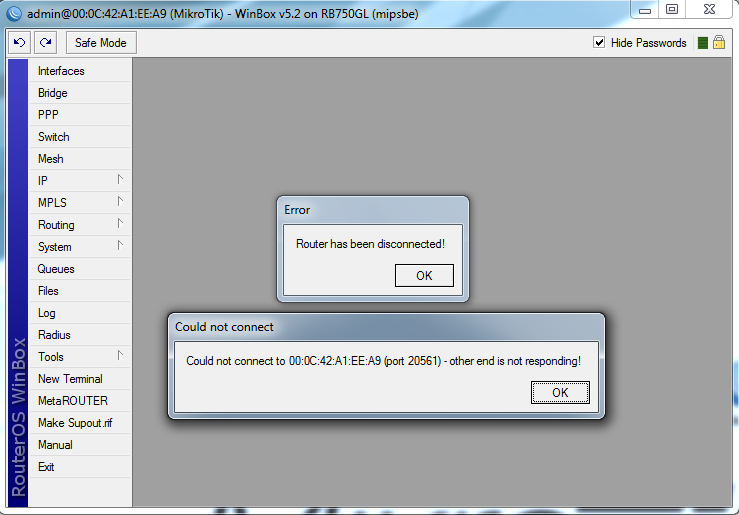
- Winbox กำลังเชื่อมต่อเข้าไปยัง RB750GL
- ปกติแล้ว MikroTik แทบทุกรุ่นจะมี config default ให้ แต่เราจะไม่ใช่ครับ กด Remove Configuration ได้เลย
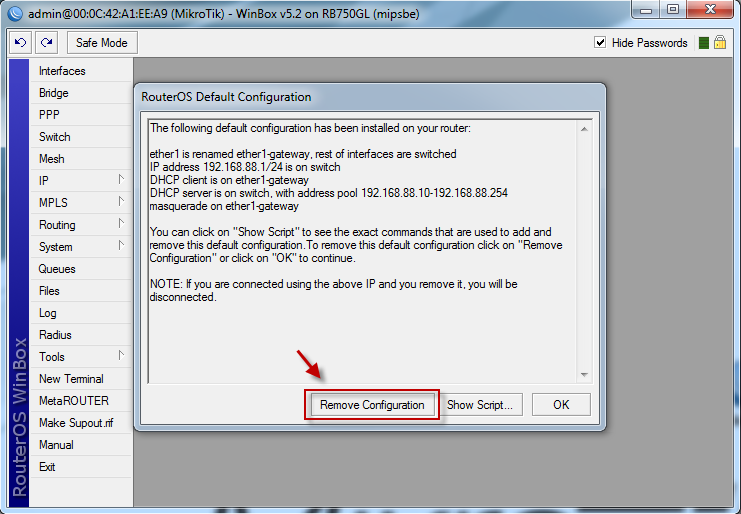
- RB750GL จะทำการ Remove config default ออก แล้วจะ reboot ตัวเอง ถ้าเกิด message เด้งขึ้นมา ก็ไม่ต้องตกใจน่ะครับ
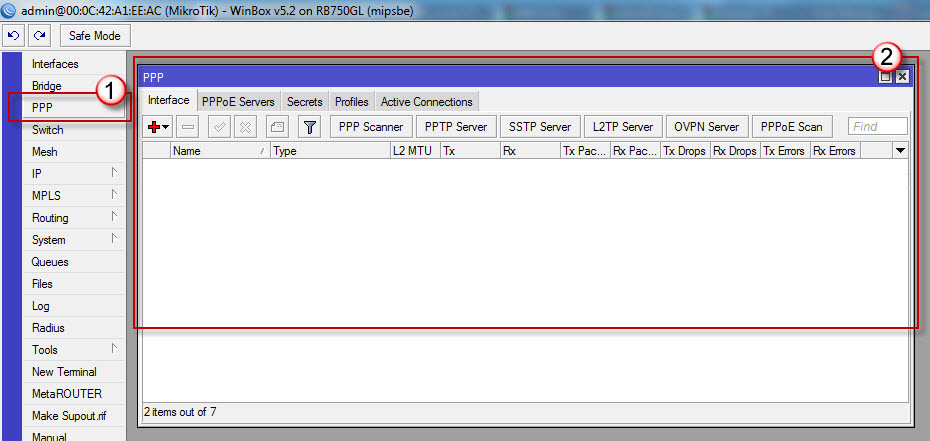
- สร้าง Connection PPPOE ผ่านเมนู PPP
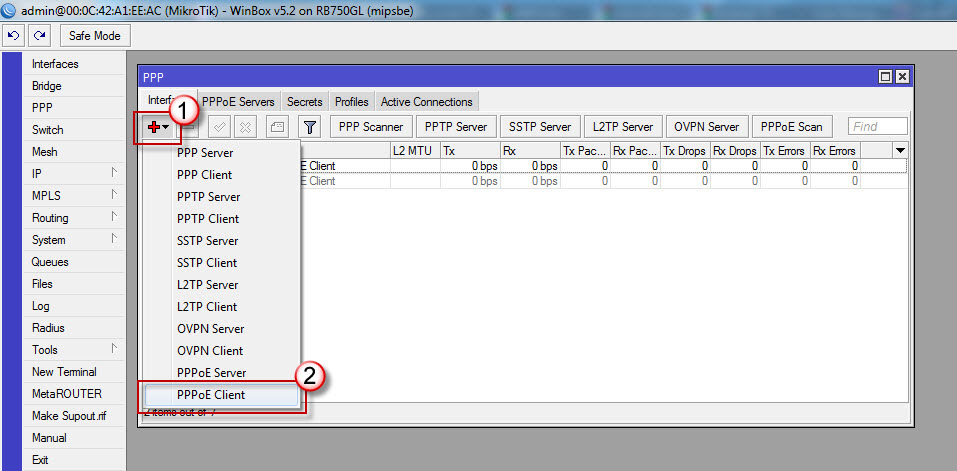
- ที่เมนู PPP กดปุ่ม + เพื่อสร้าง PPPOE โดยเลือก PPPOE Client
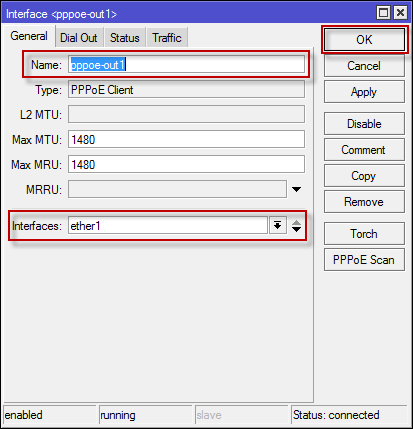
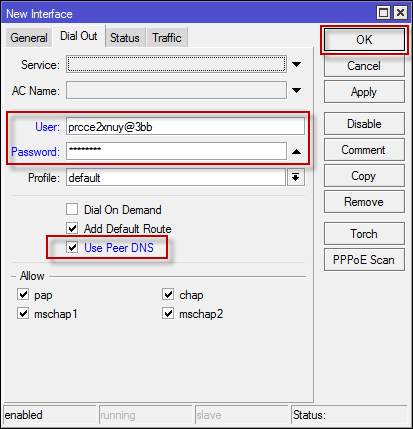
- สร้าง pppoe-out1 (3BB-7b)
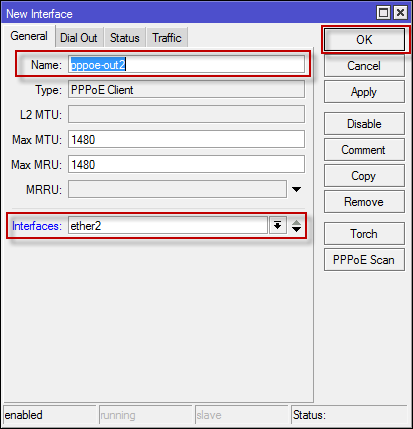
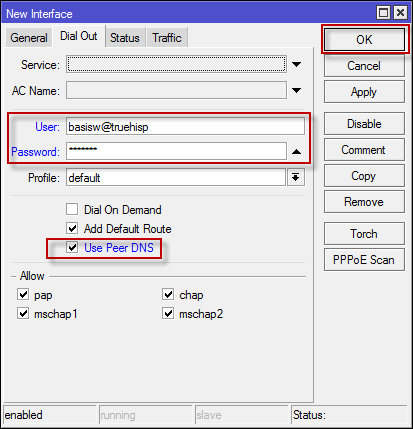
- สร้าง pppoe-out2 (TRUE-7b)
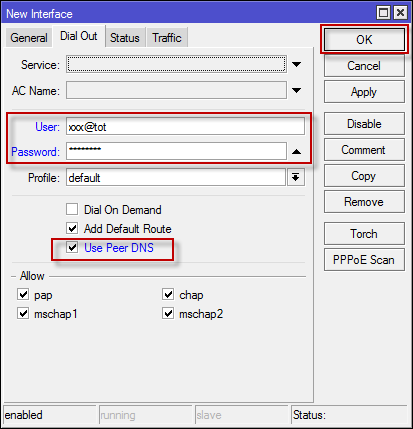
- สร้าง pppoe-out3 (สมมุติ TOT-7b) ผมมีเน็ตทดลองอยู่ 2 เส้น สร้างเส้นที่ 3 ขึ้นมา เพื่อเขียนโค้ดรองรับผู้ใช้ที่ใช้งานให้ครอบคลุม 4 เส้นครับ

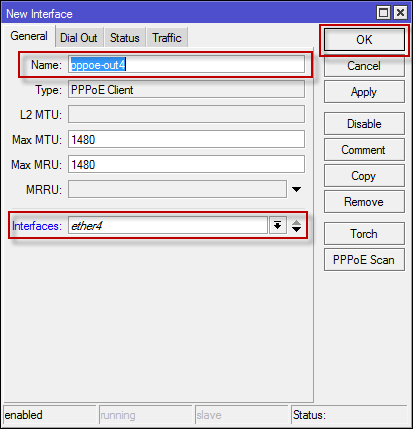
- สร้าง pppoe-out4 (สมมุติ adsl-7b) ผมมีเน็ตทดลองอยู่ 2 เส้น สร้างเส้นที่ 4 ขึ้นมา เพื่อเขียนโค้ดรองรับผู้ใช้ที่ใช้งานให้ครอบคลุม 4 เส้นครับ

- ตรวจสอบการสร้าง PPPOE ทั้ง 4 เส้นผ่านเมนู PPP > PPP

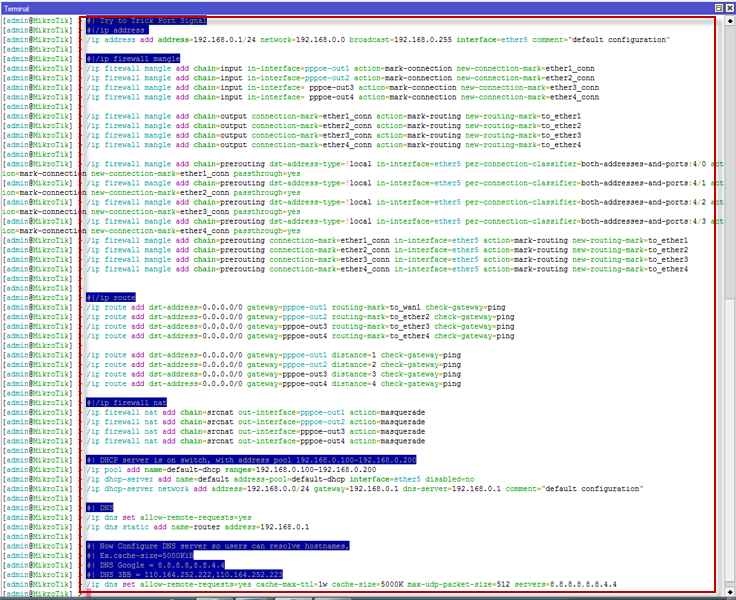
- เนื่องด้วยถ้าทำในรูปแบบ Interface นั้นจะต้อง Capture หน้าจอเยอะมาก ผมจึงขอเปลี่ยนไปใช้วิธี code ผ่าน Terminal น่ะครับ
เข้าเมนู New Terminal > Terminal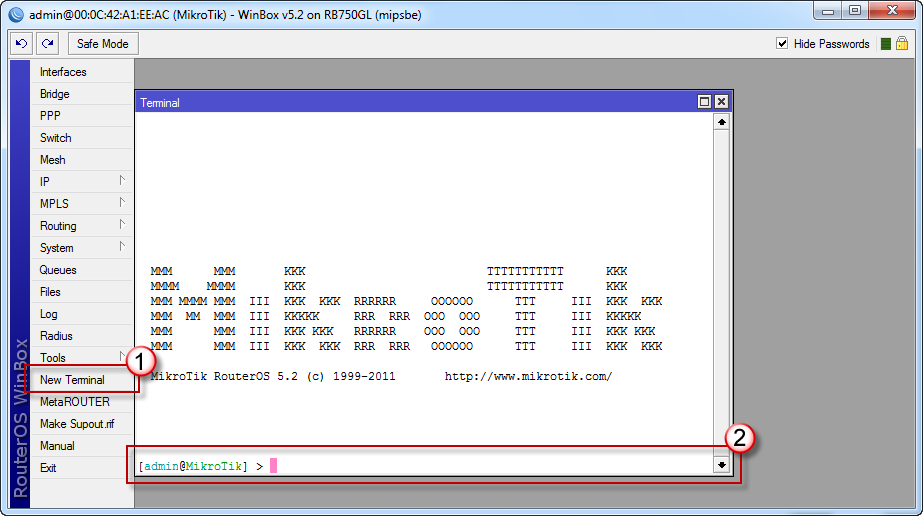
- คัดลอก code
- โค้ด: เลือกทั้งหมด
#|/ip address
/ip address add address=192.168.0.1/24 network=192.168.0.0 broadcast=192.168.0.255 interface=ether5 comment="default configuration"

#|/ip firewall mangle
/ip firewall mangle add chain=input in-interface=pppoe-out1 action=mark-connection new-connection-mark=ether1_conn
/ip firewall mangle add chain=input in-interface=pppoe-out2 action=mark-connection new-connection-mark=ether2_conn
/ip firewall mangle add chain=input in-interface= pppoe-out3 action=mark-connection new-connection-mark=ether3_conn
/ip firewall mangle add chain=input in-interface= pppoe-out4 action=mark-connection new-connection-mark=ether4_conn

/ip firewall mangle add chain=output connection-mark=ether1_conn action=mark-routing new-routing-mark=to_ether1
/ip firewall mangle add chain=output connection-mark=ether2_conn action=mark-routing new-routing-mark=to_ether2
/ip firewall mangle add chain=output connection-mark=ether3_conn action=mark-routing new-routing-mark=to_ether3
/ip firewall mangle add chain=output connection-mark=ether4_conn action=mark-routing new-routing-mark=to_ether4

/ip firewall mangle add chain=prerouting dst-address-type=!local in-interface=ether5 per-connection-classifier=both-addresses-and-ports:4/0 action=mark-connection new-connection-mark=ether1_conn passthrough=yes
/ip firewall mangle add chain=prerouting dst-address-type=!local in-interface=ether5 per-connection-classifier=both-addresses-and-ports:4/1 action=mark-connection new-connection-mark=ether2_conn passthrough=yes
/ip firewall mangle add chain=prerouting dst-address-type=!local in-interface=ether5 per-connection-classifier=both-addresses-and-ports:4/2 action=mark-connection new-connection-mark=ether3_conn passthrough=yes
/ip firewall mangle add chain=prerouting dst-address-type=!local in-interface=ether5 per-connection-classifier=both-addresses-and-ports:4/3 action=mark-connection new-connection-mark=ether4_conn passthrough=yes
/ip firewall mangle add chain=prerouting connection-mark=ether1_conn in-interface=ether5 action=mark-routing new-routing-mark=to_ether1
/ip firewall mangle add chain=prerouting connection-mark=ether2_conn in-interface=ether5 action=mark-routing new-routing-mark=to_ether2
/ip firewall mangle add chain=prerouting connection-mark=ether3_conn in-interface=ether5 action=mark-routing new-routing-mark=to_ether3
/ip firewall mangle add chain=prerouting connection-mark=ether4_conn in-interface=ether5 action=mark-routing new-routing-mark=to_ether4


#|/ip route
/ip route add dst-address=0.0.0.0/0 gateway=pppoe-out1 routing-mark=to_ether1 check-gateway=ping
/ip route add dst-address=0.0.0.0/0 gateway=pppoe-out2 routing-mark=to_ether2 check-gateway=ping
/ip route add dst-address=0.0.0.0/0 gateway=pppoe-out3 routing-mark=to_ether3 check-gateway=ping
/ip route add dst-address=0.0.0.0/0 gateway=pppoe-out4 routing-mark=to_ether4 check-gateway=ping

/ip route add dst-address=0.0.0.0/0 gateway=pppoe-out1 distance=1 check-gateway=ping
/ip route add dst-address=0.0.0.0/0 gateway=pppoe-out2 distance=2 check-gateway=ping
/ip route add dst-address=0.0.0.0/0 gateway=pppoe-out3 distance=3 check-gateway=ping
/ip route add dst-address=0.0.0.0/0 gateway=pppoe-out4 distance=4 check-gateway=ping

#|/ip firewall nat
/ip firewall nat add chain=srcnat out-interface=pppoe-out1 action=masquerade
/ip firewall nat add chain=srcnat out-interface=pppoe-out2 action=masquerade
/ip firewall nat add chain=srcnat out-interface=pppoe-out3 action=masquerade
/ip firewall nat add chain=srcnat out-interface=pppoe-out4 action=masquerade

#| DHCP server is on switch, with address pool 192.168.0.100-192.168.0.200
/ip pool add name=default-dhcp ranges=192.168.0.100-192.168.0.200
/ip dhcp-server add name=default address-pool=default-dhcp interface=ether5 disabled=no
/ip dhcp-server network add address=192.168.0.0/24 gateway=192.168.0.1 dns-server=192.168.0.1 comment="default configuration"

#| DNS
/ip dns set allow-remote-requests=yes
/ip dns static add name=router address=192.168.0.1

#| Now Configure DNS server so users can resolve hostnames,
#| Ex.cache-size=5000KiB
#| DNS Google = 8.8.8.8,8.8.4.4
#| DNS 3BB = 110.164.252.222,110.164.252.223
/ip dns set allow-remote-requests=yes cache-max-ttl=1w cache-size=5000K max-udp-packet-size=512 servers=8.8.8.8,8.8.4.4
สำหรับกรณีที่ ความเร็ว Internet ไม่เท่ากัน ก็สามารถแก้ไขโค้ดบรรทัดดังนี้ (ตัวอย่าง WAN 1,2,3 ความเร็ว 4Mb และ WAN 4 ความเร็ว 8 Mb)
(หลักการคือ ในการวน 1 ลูปจะมีกี่ครั้งก็ได้ เพียงพยายามแชร์ Bandwidth ที่จะใช้เท่าๆกัน หรืออาจจะเซตไปบางLink เป็นพิเศษ ตามความต้องการก็ได้ครับ
- ในตัวอย่าง 1 ลูปมี 5 ครั้ง 4/0 ไปจนถึง 4/4 โดยพยายามเกลี่ย Bandwidth ที่ใช้ให้ออกผ่าน Link ทั้งหมด ให้ใกล้เคียงกัน)
add chain=prerouting dst-address-type=!local in-interface=Local per-connection-classifier=both-addresses-and-ports:4/0 action=mark-connection new-connection-mark=ether1_conn passthrough=yes
add chain=prerouting dst-address-type=!local in-interface=Local per-connection-classifier=both-addresses-and-ports:4/1 action=mark-connection new-connection-mark=ether2_conn passthrough=yes
add chain=prerouting dst-address-type=!local in-interface=Local per-connection-classifier=both-addresses-and-ports:4/2 action=mark-connection new-connection-mark=ether3_conn passthrough=yes
add chain=prerouting dst-address-type=!local in-interface=Local per-connection-classifier=both-addresses-and-ports:4/3 action=mark-connection new-connection-mark=ether4_conn passthrough=yes
add chain=prerouting dst-address-type=!local in-interface=Local per-connection-classifier=both-addresses-and-ports:4/4 action=mark-connection new-connection-mark=ether4_conn passthrough=yes
ผมแนะนำให้คัดลอกโค้ดเก็บไว้เป็น Word เพราะถ้าต้องการเปลี่ยน IP หรือเปลี่ยนค่าอื่นๆ เราสามารถใช้ฟังก์ชั่นค้นหาและแทนที่ ได้เลย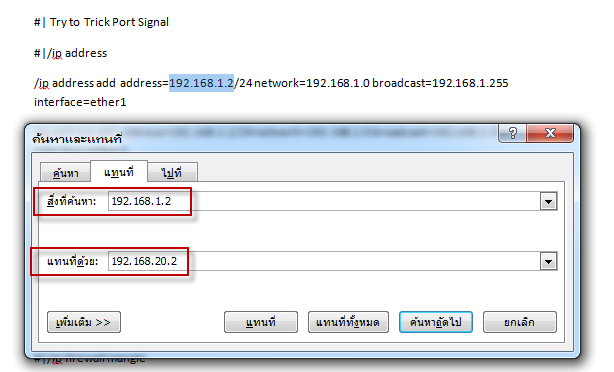
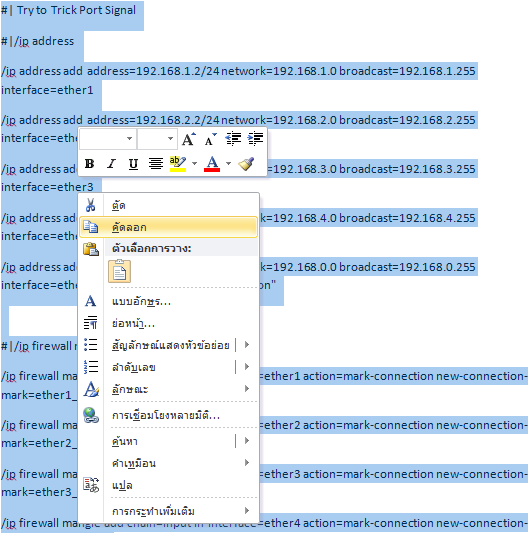
- คลิกขวา ที่แถบ command บน terminal แล้ว Paste
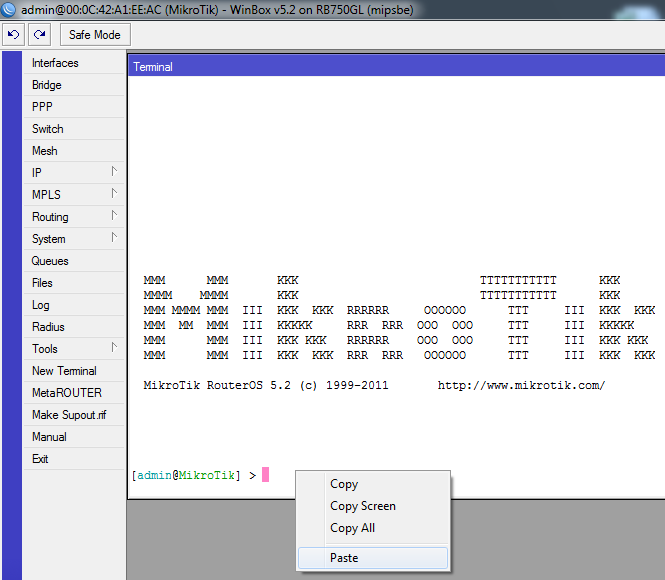
- รูปแสดงตัวอย่างการป้อนโค้ด
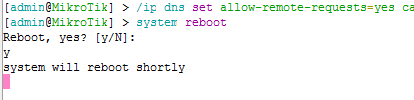
- หลังจากป้อนโค้ดเสร็จแล้วควรสั่ง Reboot ครั้งหนึ่ง ด้วยคำสั่งบน terminal ดังนี้ system reboot
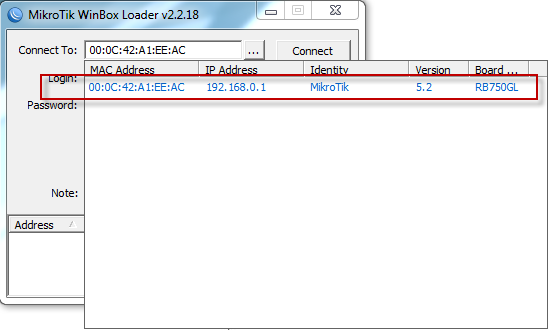
- หลัง RB750GL reboot เสร็จ ก็ connect เชื่อมต่อใหม่อีกครั้ง
- ทดสอบโหลดเต็มสปีด
สังเกตุ pppoe-out1 Rxวิ่ง 6Mbps, pppoe-out2 Rxวิ่ง 7.1Mbps และ ether5 Txวิ่ง 13.5Mbpx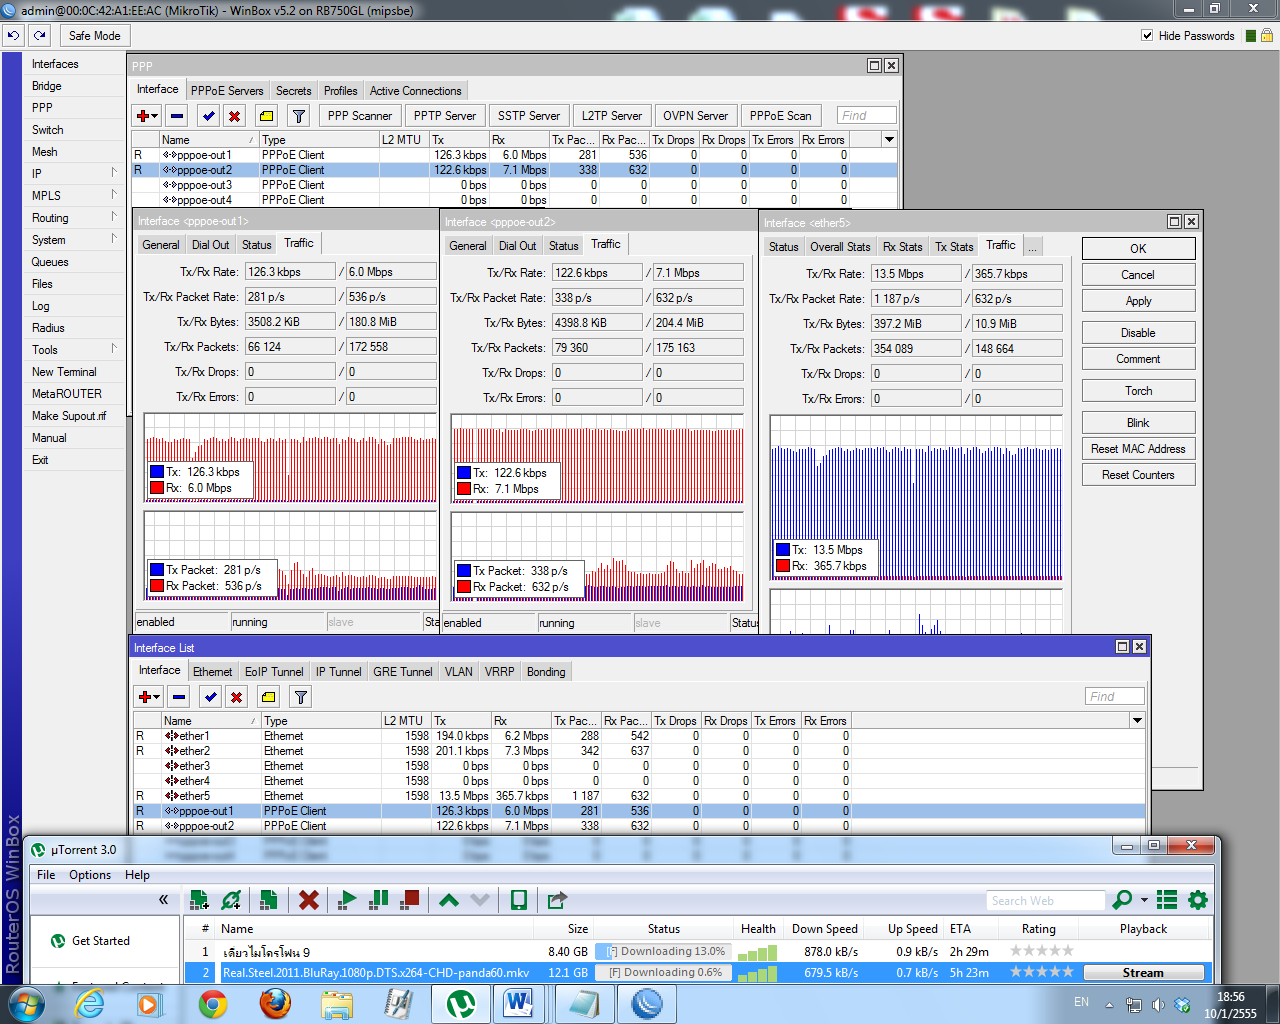
- ทดสอบถอดเน็ตแต่ละเส้น โดยไล่ถอด 3BB ก่อน สลับกับ True เพื่อตรวจสอบว่า RB750GL เชื่อมต่อและสลับ Link ใช้อัตโนมัติหรือไม่ ซึ่งผลก็คือ ได้ครับ

สังเกตจากกราฟ ที่ pppoe-out1 ถูกถอดออกจะลดหายไป แต่ใน ether5 ยังสามารถโหลดได้อยู่แต่จะได้ ประมาณ 6Mbps กว่าๆ ซึ่งได้มาจาก pppoe-out2
และเมื่อเชื่อม pppoe-out1 เข้าไปใหม่ ใน ether5 ก็กลับมาโหลดได้เต็มที่ประมาณ13Mbps กว่าๆเหมือนเดิม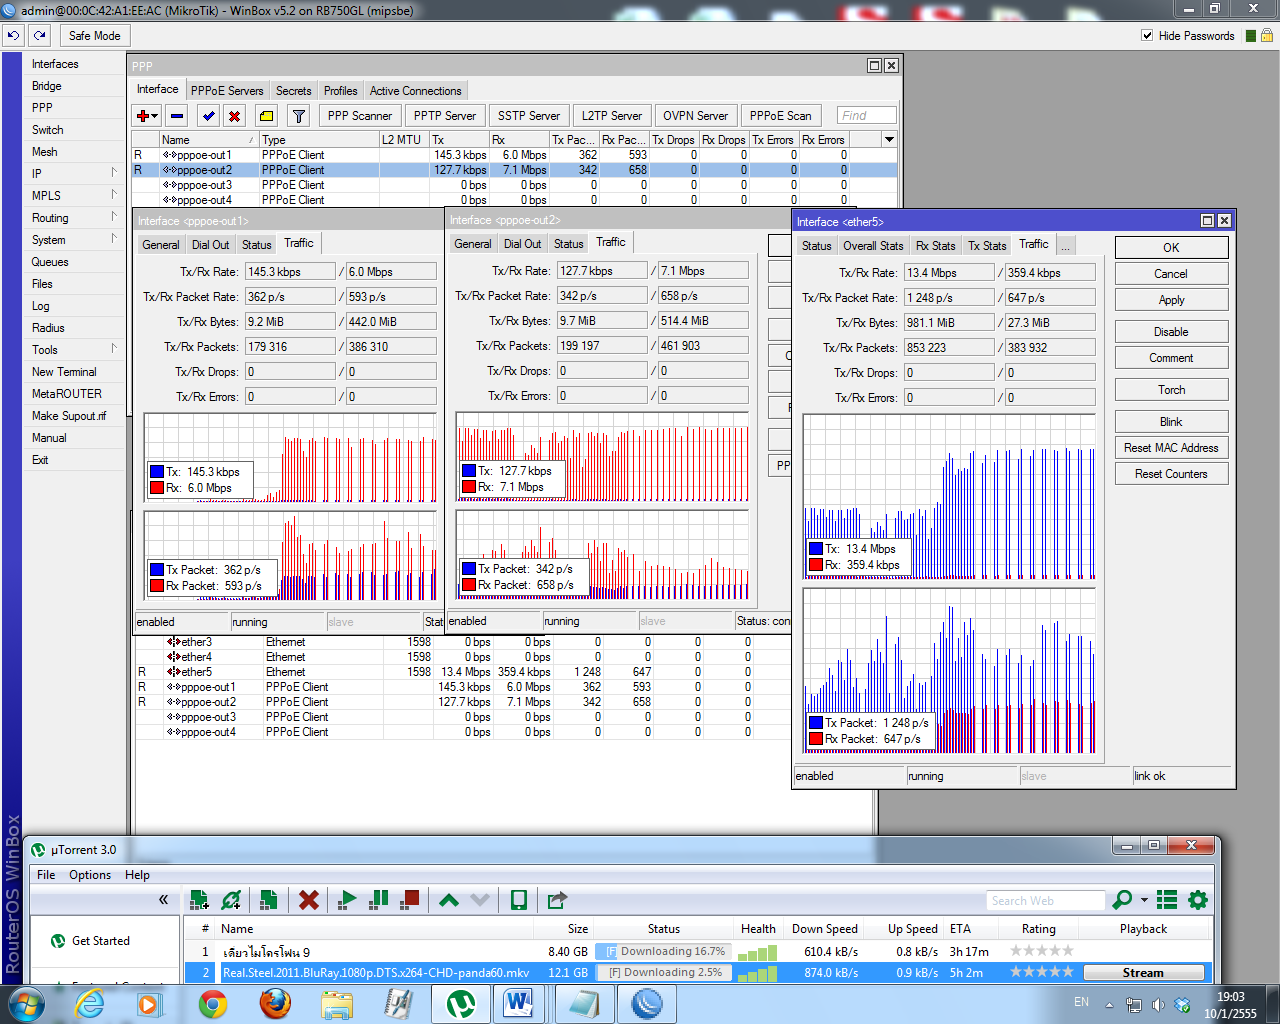
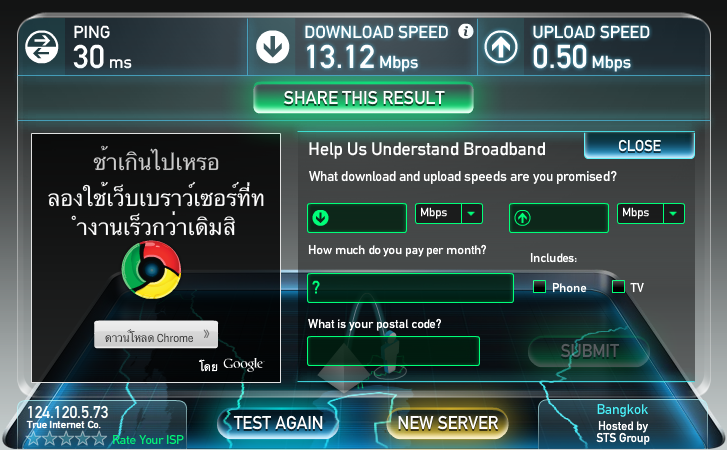
- TEST SPEED ผ่าน Web Browser (วิ่งรวม 2 เส้นได้ประมาณ 13.12Mbps)
ปล.
- โค้ดที่ให้มานี้อาจจะไม่ดีที่สุด แต่ก็สามารถใช้งานได้ดีระดับหนึ่ง
ผู้อ่านท่านใดมีคำแนะนำ สามารถแนะนำกันได้ครับ จะได้ช่วยกันพัฒนาต่อยอด
ซึ่งทาง sys2u เราก็จะพยายามหาวิธี ที่จะให้ผู้ใช้ สามารถเซตค่าตัวอุปกรณ์ MikroTik ให้ได้ง่ายกว่านี้ครับ
ข้อมูลสินค้าแบบมัลติมีเดีย (Multimedia)
จบบทความ
รายละเอียดการให้บริการจากทีมงาน SYS2U.COM Xpert Zone